White Chocolate Peppermint Pancakes & Paleo Chocolate Syrup

paleo pancakes

White Chocolate Peppermint Protein Pancakes with Paleo Chocolate Syrup. I know it is a mouthful of a description, but I’m sure you’ll agree with me after trying these pancakes that it is at least a very delicious mouthful.

In case you couldn’t tell from my last post, I was pretty excited about the release of the White Chocolate Peppermint Meal Replacement Shakes from AdvoCare. Apparently, I was not the only one, because they sold out in record time (56 hours I believe!) and the second I had a sip of my first shake I totally understood why. They were BETTER than I had even expected. I mean, holiday-spirit-in-a-cup, freakin’ amazing! In case that description doesn’t clue you in to how tasty the shakes are, these fun facts might: James and I ordered 10 more boxes before the glass was empty AND I had TWO the first day in between meals. They were that good. Have I mentioned how much I love this company and products because they clearly love all of us? 😀 😀

I have had so much fun creating several recipes with these shakes, and before you get too bummed out that you didn’t scoop up a box or two before they disappeared like Frosty the Snowman on the first day of Spring, you can substitute any flavor of Meal Replacement Shakes in for the White Chocolate Peppermint and I promise it will still be yummy!

One of James’s favorite breakfast foods is pancakes. I’m still more of a waffle kinda gal, but I love me some pancakes too. Now your regular ol’ fluffy IHOP pancake is most definitely not Paleo, but thanks to some creative geniuses out there, we are still able to enjoy these breakfast staples. Depending on the ingredients you use, some Paleo pancakes can turn out more dense than others (a.k.a. not as fluffy), but I used a great recipe for inspiration that did not leave us wanting.

Anyone that knows me well enough can tell you that I LOVE maple. So naturally I am a big fan of pancakes with maple syrup. In fact, if you and I ever eat pancakes together you’ll likely see me eating a plate more accurately described as maple syrup with pancakes. Good thing in our home we focus on eating to fuel our bodies the majority of the time and not just indulging!

With that being said, I wanted to do something a little different that would compliment the white chocolate peppermint flavor in the pancakes, so I decided to go with a Paleo chocolate syrup instead!

This breakfast is more of a treat, but a less indulgent/equally flavorful alternative to a typical pancake breakfast 🙂

Pancake Recipe

advocare meal replacement shakes

Pancake Ingredients

Ingredients:

  • 3 large eggs
  • 1 cup Almond Flour
  • 2 TBSP Coconut Oil
  • 1 Meal Replacement Shake (Vanilla might be a good option if you don’t have White Chocolate Peppermint)
  • 1/4 tsp Sea Salt
  • 2 tsp Vanilla Extract
  • 4.5 TBSP Water
  • Oil for cooking

Directions:

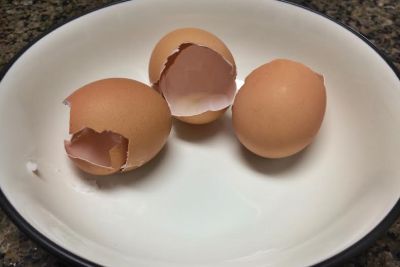
eggs for advocare meal replacement shakes

  1. In a blender, add the 3 eggs and blend on high for 1 minute.
  2. Add remaining ingredients and blend until smooth, about another minute. I pre-whisked the dry ingredients in a bowl beforehand to add into the blender, followed by the wet ingredients.
  3. Heat skillet over medium heat and add coconut oil for cooking.
  4. Pour pancake batter into pan and let cook for about 1-2 minutes on each side.

Paleo Chocolate Syrup Recipe

I woke up thinking about how I would make the chocolate syrup for the pancakes and was definitely on the right track, but then stumbled upon an awesome recipe already created. Never one for totally reinventing the wheel, I decided to give it a try! It turned out great and made my morning easier since I didn’t have to do a ‘trial and error’ process with my idea for syrup. This recipe yields quite a bit of syrup, so I saved the rest in a mason jar to use for Chocolate Almond Milk this week.

unnamed-4

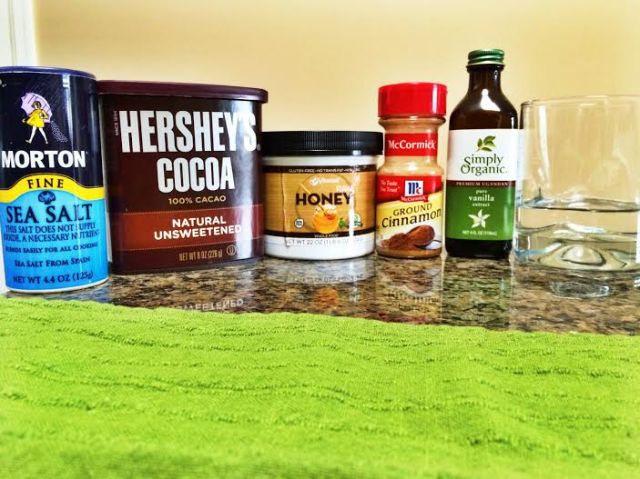
Chocolate Syrup Ingredients

Ingredients:

  • ¾ cup unsweetened cocoa powder
  • 1 cup organic honey
  • ¾ cup water
  • ½ tsp cinnamon
  • ¼ tsp sea salt
  • 1.5 tsp vanilla extract

Directions:

  1. Add all ingredients to a sauce pan over medium heat. Whisk until smooth.
  2. Once boiling, lower heat to medium-low and allow to simmer for 2-3 minutes. The sauce should be thickening, but make sure to stir frequently to avoid burning.
  3. Once thickened, but not too thick, remove from burner and let cool. Pour majority of syrup into a mason jar or other air tight container and use remaining syrup in pan for your pancakes.

I have more recipes using the shakes coming tomorrow, as well as a few more I am behind on posting, so be on the lookout and be sure to subscribe to the blog so you’ll get the updates when I post them!

Also, if you give this recipe a try and enjoy it, think it sounds yummy and want to share, or just feel like saying hi, would you be so kind as to give this amateur cook a comment below? I’d love to hear from you! 🙂

I’m Dreaming of A White (Chocolate Peppermint Shake) Christmas

*UPDATE 11-18-2015: THEY’RE BACK!!!

Say it with me, 'YUM!'

Say it with me, ‘YUM!’

Just imagine I was tech savvy enough to have this song playing throughout your time on this post, knew how to make snowflakes fall delicately across the page, and had a nice log burning fire going to keep you toasty and warm as you read…

AdvoCare has just released their limited time Holiday White Chocolate Peppermint Meal Replacement Shakes and I know I have found my new favorite replacement for breakfast…and lunch…and dinner 😀 (Although I haven’t found a flavor of Meal Replacement Shakes that I didn’t love and with a 40% discount, who says I have to pick favorites?) For anyone that has had the Meal Replacement Shakes before, you know they taste even better than they sound! When it comes to the Holiday flavors, James and I don’t mess around and stock up on them before they quickly sell out! I have experimented with different baking recipes to see if there is any way I could top the regular ol’ shake forms and found a handful of other ways to use them in delicious treats. Several of my friends inspired me to give this recipe a whirl:

I had seen the recipe for Muscle Gain Ice Cream a while back and had intended on trying it out before the weather cooled off, but totally forgot! (Thanks a lot Pregnancy Brain!) James had a day off from work recently, so we decided ice cream for breakfast was just what the doctor ordered. All I can say is, Ah-mah-zing! Super easy to do and SO delicious. I originally tried it with the Holiday Pumpkin Spice flavor and you can bet your bottom dollar I will be making this with the newest flavor.

White Chocolate Peppermint ice cream that’s healthy? Yes, Please! You’ll have to try it for yourself! 🙂

White Chocolate Peppermint Ice Cream:

  • 1 blender bottle with whisk ball (or medium sized bowl with standard whisk if you don’t have a blender bottle)
  • 1 gallon sized plastic bag filled 1/2 way with ice
  • Approximately 1/2 cup of ice cream salt (or regular salt if you don’t have ice cream salt)
  • 1 quart size plastic bag
  • 1 cup almond milk (or whatever your milk of choice is)
  • 1 White Chocolate Peppermint Meal Replacement Shake
  • Handful (or more 😉 ) of Mini Enjoy Life Chocolate Chips
  • Optional: ingredients to mix in ice cream or for toppings

Instructions:

  1. In the blender bottle or bowl if you don’t have a bottle, mix the milk, Meal Replacement Shake, and any other liquid or powder ingredients you’ve chosen.
  2. Pour contents of blender bottle/bowl into quart size plastic bag, remove as much air as possible from bag, and seal tightly.
  3. Add salt to gallon sized bag with ice
  4. Place quart sized bag into the gallon sized bag, remove air from bag, and seal tightly.
  5. Optional: Wrap the bag in a kitchen towel to keep your hands from turning into ice cubes 😉
  6. Shake, shake, shake! (the gallon bag around for 5-10 minutes.)
  7. Remove quart sized bag from gallon bag and quickly rinse off any salt from exterior of bag in cold water…unless you like really salty ice cream.
  8. Place your ice cream in a bowl, add toppings, and enjoy! 😛

If you were one of the smart/fortunate ones who ordered the Pumpkin Spice Shakes before they sold out, you’ll love this one too!

Pumpkin Spice Ice Cream:

  • 1 blender bottle with whisk ball (or medium sized bowl with standard whisk if you don’t have a blender bottle)
  • 1 gallon sized plastic bag filled 1/2 way with ice
  • Approximately 1/2 cup of ice cream salt (or regular salt if you don’t have ice cream salt)
  • 1 quart size plastic bag
  • 1 cup almond milk (or whatever your milk of choice is)
  • 1 Meal Replacement Shake
  • Optional: ingredients to mix in ice cream or for toppings

Instructions:

  1. In the blender bottle or bowl if you don’t have a bottle, mix the milk, Meal Replacement Shake, and any other liquid or powder ingredients you’ve chosen.
  2. Pour contents of blender bottle/bowl into quart size plastic bag, remove as much air as possible from bag, and seal tightly.
  3. Add salt to gallon sized bag with ice
  4. Place quart sized bag into the gallon sized bag, remove air from bag, and seal tightly.
  5. Optional: Wrap the bag in a kitchen towel to keep your hands from turning into ice cubes 😉
  6. Shake, shake, shake! (the gallon bag around for 5-10 minutes.)
  7. Remove quart sized bag from gallon bag and quickly rinse off any salt from exterior of bag in cold water…unless you like really salty ice cream.
  8. Place your ice cream in a bowl, add toppings, and enjoy! 😛
Pumpkin Spice Ice Cream!

The finished product: Pumpkin Spice Ice Cream with added Pecans!

I used Hint of Honey Vanilla Almond Milk in the shake and sprinkled chopped pecans as my topping. YUM!

Although James loves the Pumpkin Spice shakes, he is a chocolate ice cream guy through and through. He decided to go with Chocolate Peanut Butter Chocolate Chip Ice Cream for dessert breakfast. He then proceeded to add more Mini Enjoy Life chocolate chips as toppings, but when your ice cream is only 260 calories and packed with 22 grams of protein, I’d say it evens out. 😉

James’s Ingredients included:

James's yummy ice cream!

James’s yummy ice cream!

We will definitely be making this recipe again in the near future!

Baked Coconut Chicken Nuggets

One thing that I have really come to appreciate as I’ve matured into my mid-twenties is discovering my passions. Some have been slower to develop than others, but one passion that just feeds my soul is cooking. (Try telling me I’m not your punniest friend) It wasn’t until I moved to Baton Rouge that I really began to experiment with cooking and fell in love. Don’t get me wrong, Louisiana has some of the BEST food you’ll find in the U.S. of A., but when it comes to healthy eats it doesn’t quite take first place. As I became more aware of what I was putting into my body I realized I had the most control over my health in the kitchen. And so, I began to cook. I definitely have a long way to go, but I’ve been testing out my skills cooking for James (Shoutout to the best guinea pig er, husband out there) and he has yet to find a recipe that I’ve prepared that he doesn’t like. Say it with me, winning!

One of the very first recipes I prepared after we got engaged was this Baked Coconut Chicken recipe, adapted from paleodietmentor.

I’m a sucker for flavorful, but relatively simple paleo versions of some of my old favorites. This recipe fit the bill and has since become a staple in our house. Here is my James approved and 24 Day Challenge friendly version:

BAKED COCONUT CHICKEN NUGGETS

  •  1lb. boneless, skinless, hormone-free Chicken breastsPaleo Chicken Nuggets
  • 1/2 cup almond flour/meal
  • 1/2 cup unsweetened shredded coconut
  • *1/2 tsp paprika
  • *1/2 tsp cinnamon
  • 1/2 tsp sea salt
  • 1/4 tsp black pepper
  • 1 egg
  • coconut oil
  • cutting board
  • pan/cookie sheet with foil

*Depending on my tastes for the day I will swap out the paprika for cinnamon as a fun/sweeter twist.

  1. Preheat the oven to 400 degrees F.
  2. In a bowl or on a large plate combine almond flour, shredded coconut, paprika, sea salt, and black pepper.
  3. In a separate bowl beat egg well.
  4. Cut chicken breasts into 2 inch ‘nuggets’ then dip into bowl with egg until well coated.
  5. Roll chicken nuggets into dry ingredient mixture, coating all sides evenly.
  6. Coat pan with coconut oil, or lightly coat cookie sheet with coconut oil.
  7. Place chicken on pan and bake for 25 minutes, watching for them to turn golden.

That’s about it! I serve these bad boys with honey, organic dijon mustard, or organic ketchup, but the sauce is up to you.

Enjoy!